What is a photogram.
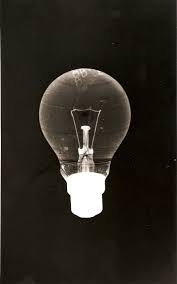
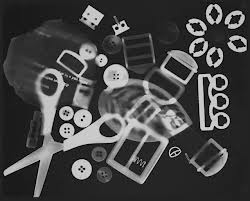
A photogram is a type of photograph produced by different objects placed on some unexposed photopaper then you expose the paper for an amount of time. The photo that i have put on the side is one of man rays photograms or rayograms as some people might call it. You can clearly see the different objects used, for example scissors, buttons etc. This photogram is very detailed as in you can see the objects very clearly as in you can see the holes that are in the buttons and the viens in the leaf. man ray is one of the most famous people to make a photogram and later on it was named after him, hence the term rayogram.
How to make a photogram
To make our photograms we went into the dark room in our school and we turned down the lights so there was just a dim red light that keeps the paper unexposed when you remove the paper from the packaging, then we got some unexposed photo paper and put it down on our surfaces were there was a little rectangle of red light , after that we placed our objects on the still unexposed photo paper and we thought about the composition we wanted ( where we wanted all of our objects to be ) when we had completed this we exposed the photo paper by removing the red lense. we exposed the light sensative paper for a set amount of time I exposed my photogram for 2 seconds then I placed my exposed photopaper into the developer and started my timer for 2 minutes, i swayed my photopaper making sure it was fully covered in the developing chemical i watched as the photo paper started to turn black at this time you start to see your objects that were placed on the paper these places will still be white because the light has not reached the places covered by the objects. when the time was up on the clock i swiftly moved my photogram from the developer to the stop and started my timer for 1 minute, in the stop you see no more visual changes on the photo paper this step just stops the developer from going any further. Our final step was to place the photogram in the fix for another 2 minutes and then when the time is up you can turn the lights on fully then you rinse your photogram in some water and dry it with the squidgey and hang it up to dry further more. By this time once the lights are on you will be able to see the photogram clearly.
These are some examples of photograms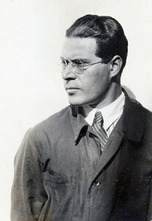
moholy nagy
Laszlo Moholy Nagy was a hungarian painter as well as a photographer and a professor in a bauhaus school. He was highly influenced by constructivism and a strong advocate and the integration of technology and industry into the arts 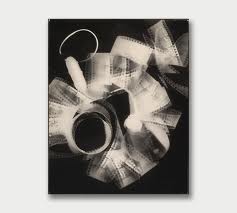
|
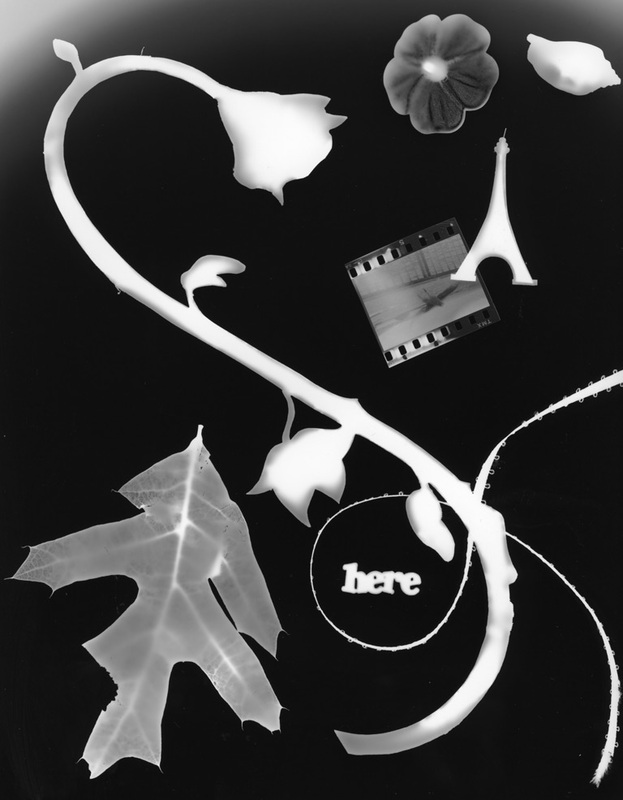
My photogram
The photogram at the top of this page is one of my photograms I am happy with my photogram and i think the photogram project was really good and the experience in the dark room was really good. I enjoyed coming back up at lunch time to do some extra work with Bethany tran because we got an extra hour in the dark room. i think the photograms that i done were really good because i planned the exposure time and everything on some test strips and the final on which is the one at the top of the page turned out really well i think. You can clearly see the objects on the photo paper but the objects are not bold so you can see the detail in the objects for example the key chain you can see all of the individual hooks in the actual links. The lightbulb has also turned out well because its not the pure white colour its more of a smokey colour. i also think my photogram tured out well because it isnt all one tone it has differant tones some are smokey grey some are a light white and some are a dim white - grey. 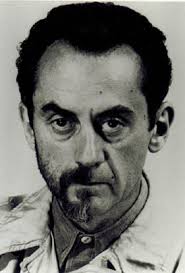
Man ray
Emmanuelle Radnitzky commonly known as man ray was an american modernist artist who spent most of his working life in the capital of france (paris). He considered himself a painter above all the other media devices he used. He is most known for his photography. man ray is also noted for his work with photograms and called them rayographs in refrence to himself. 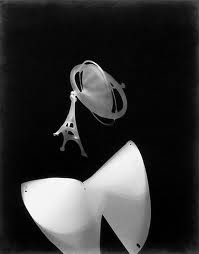
|